

How to Create and Use a System Restore Point in Windows 11
Learn how to create and use a System Restore Point in Windows 11 with this easy step-by-step guide. Protect your PC and restore Windows settings safely.

How to Create and Use a System Restore Point in Windows 11
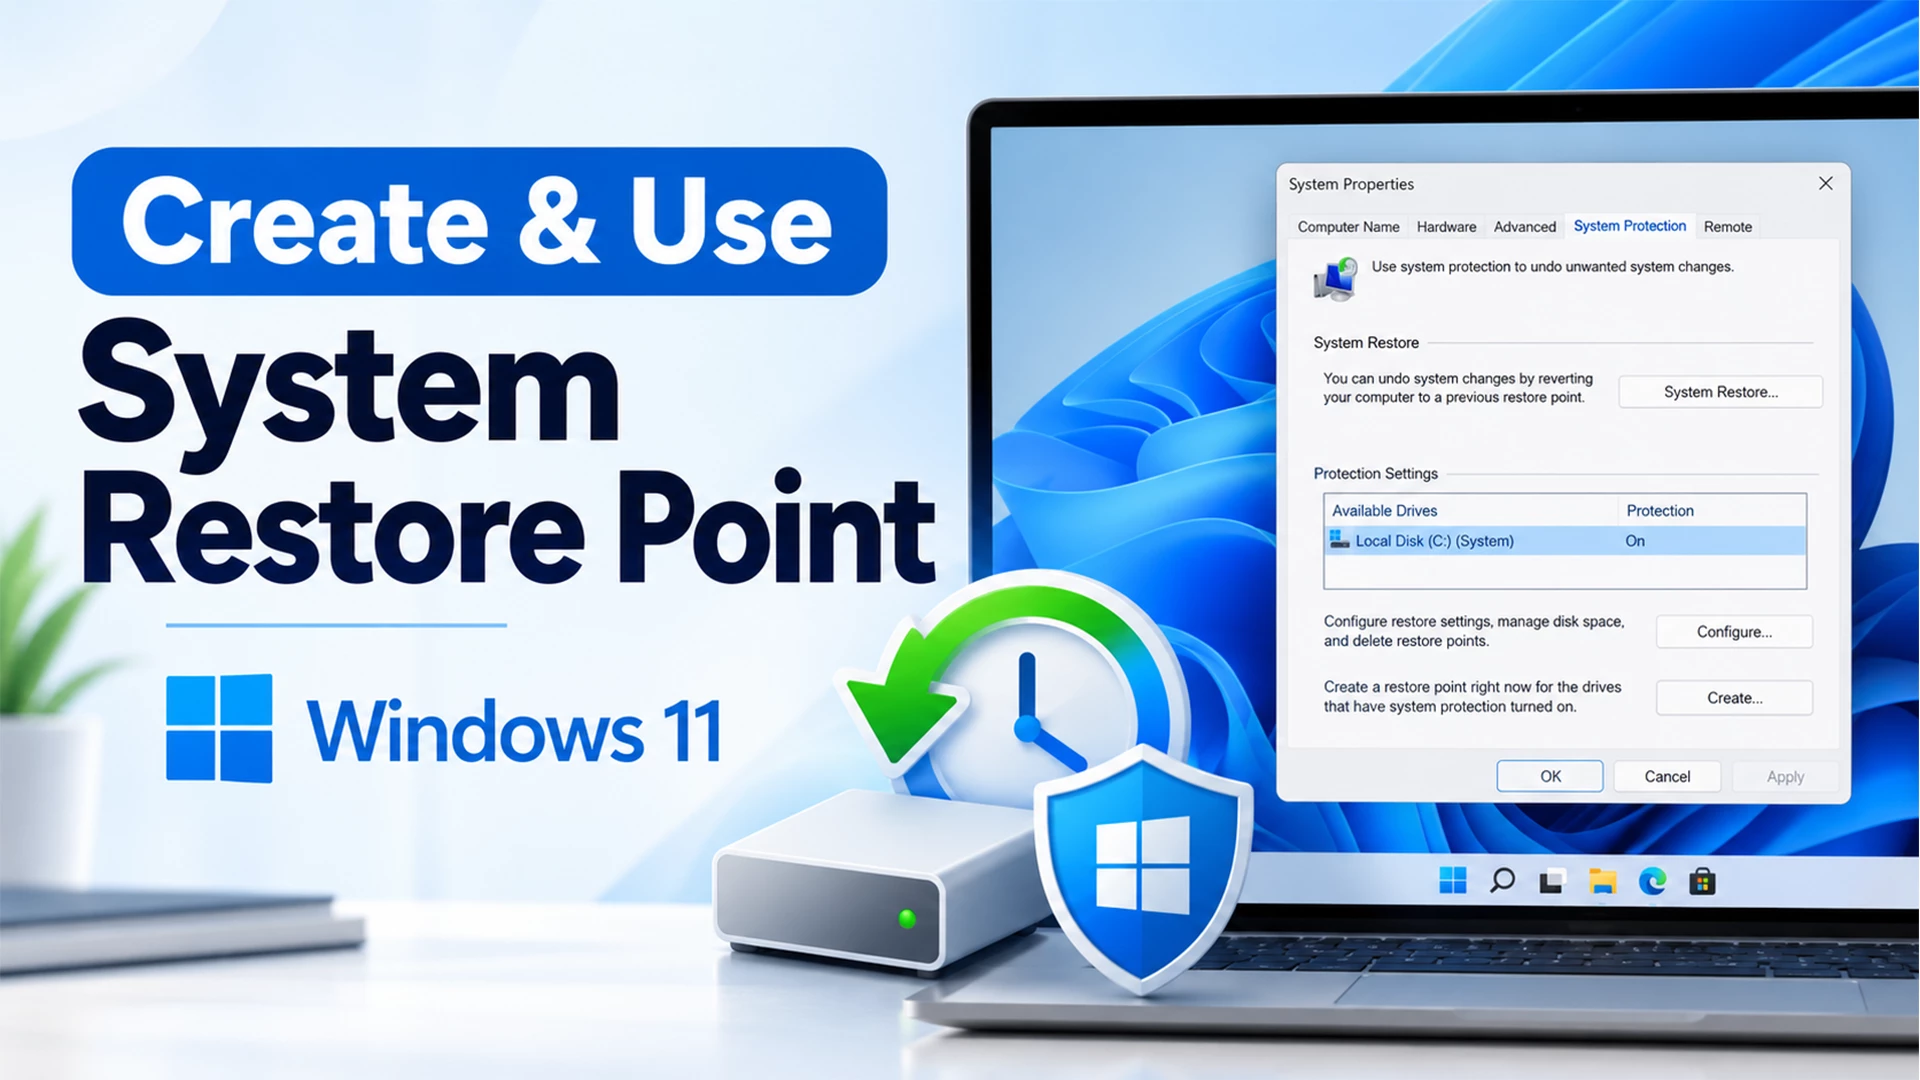
Before installing a custom theme, icon pack, or any Windows customization tool, it’s always a good idea to create a System Restore Point.
A System Restore Point helps you bring Windows back to an earlier state if something goes wrong. This can be helpful if a custom theme, software, or other system changes cause problems on your computer.
In this guide, we’ll show you how to create a System Restore Point in Windows 11 and how to use it when needed. Just follow the simple steps below.
Part 1: How to Create a System Restore Point in Windows 11
Creating a restore point is simple and only takes a few steps. It’s a good idea to do this before installing any custom themes or making changes to Windows.
Step 1: Open System Protection
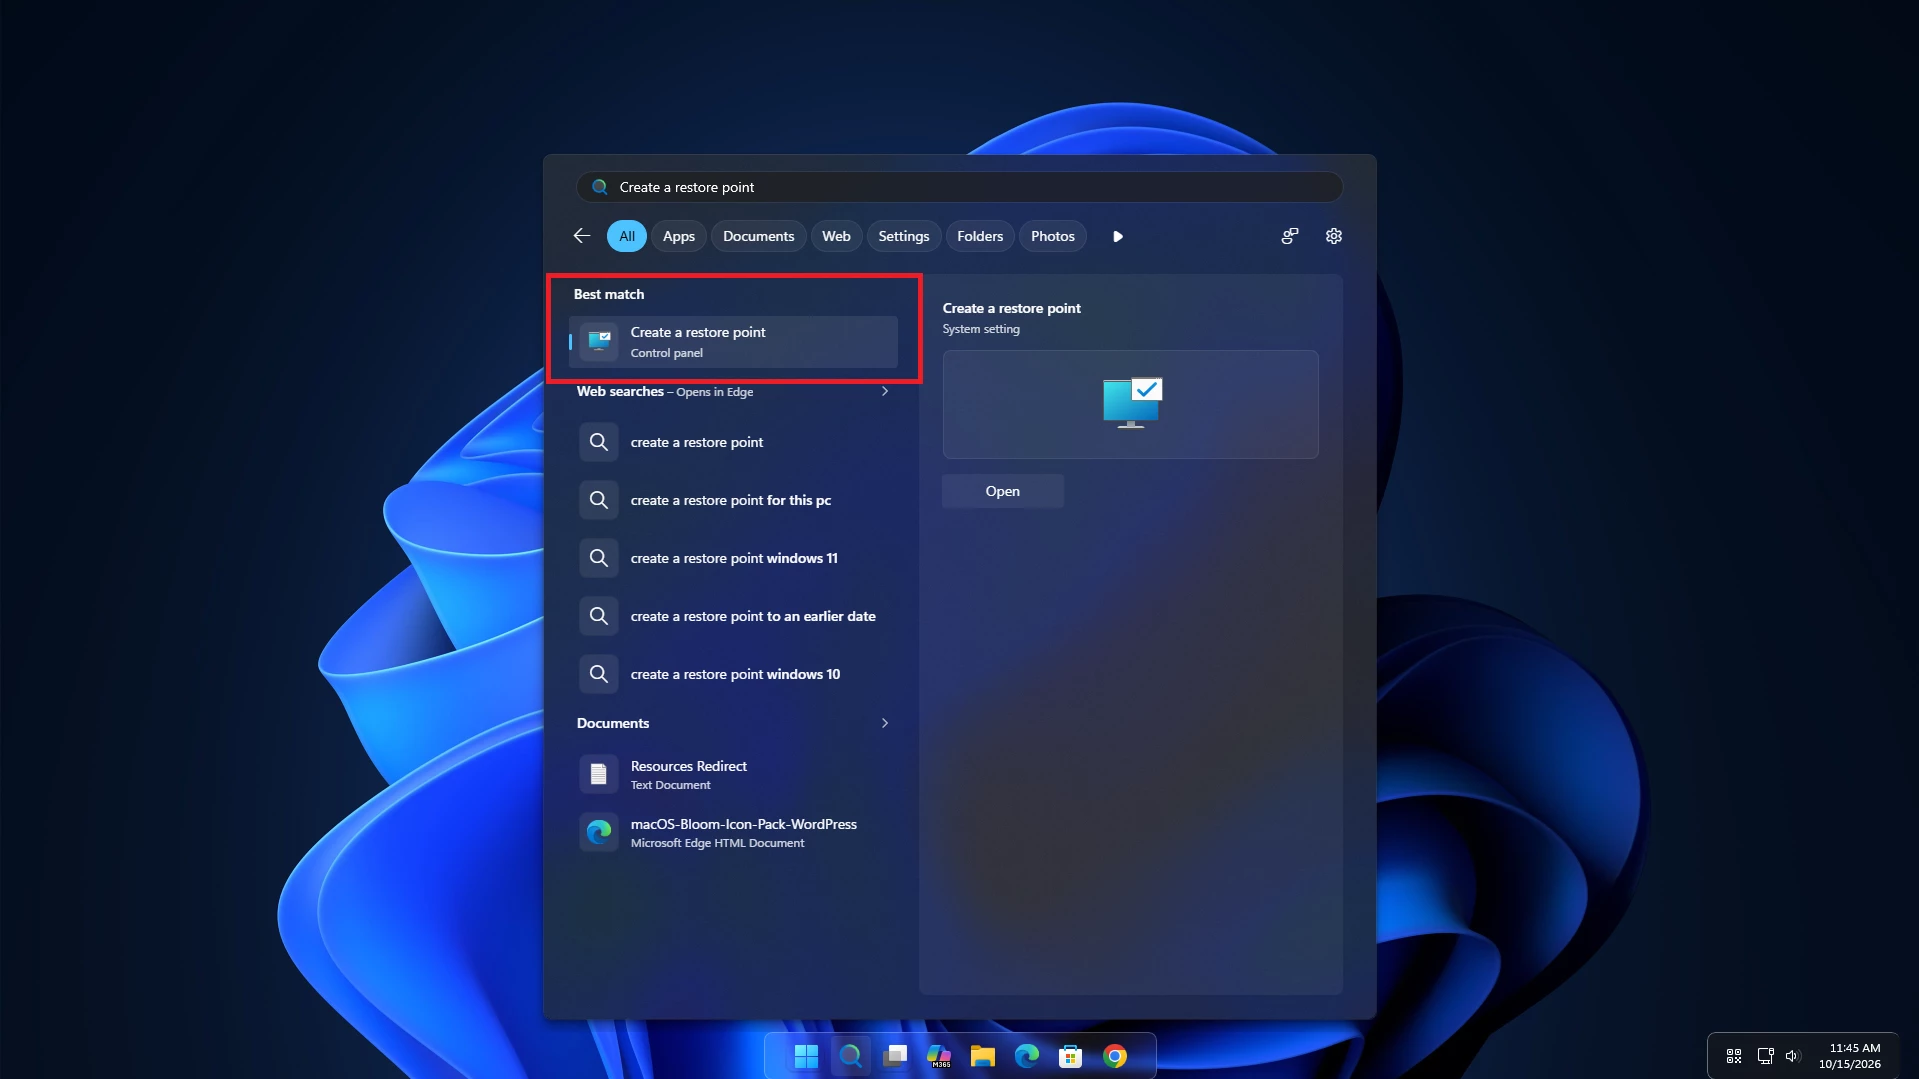
- Open the Start Menu on your computer.
- Search for Create a restore point.
- Click on it to open the System Properties window.
Step 2: Select Your Windows Drive
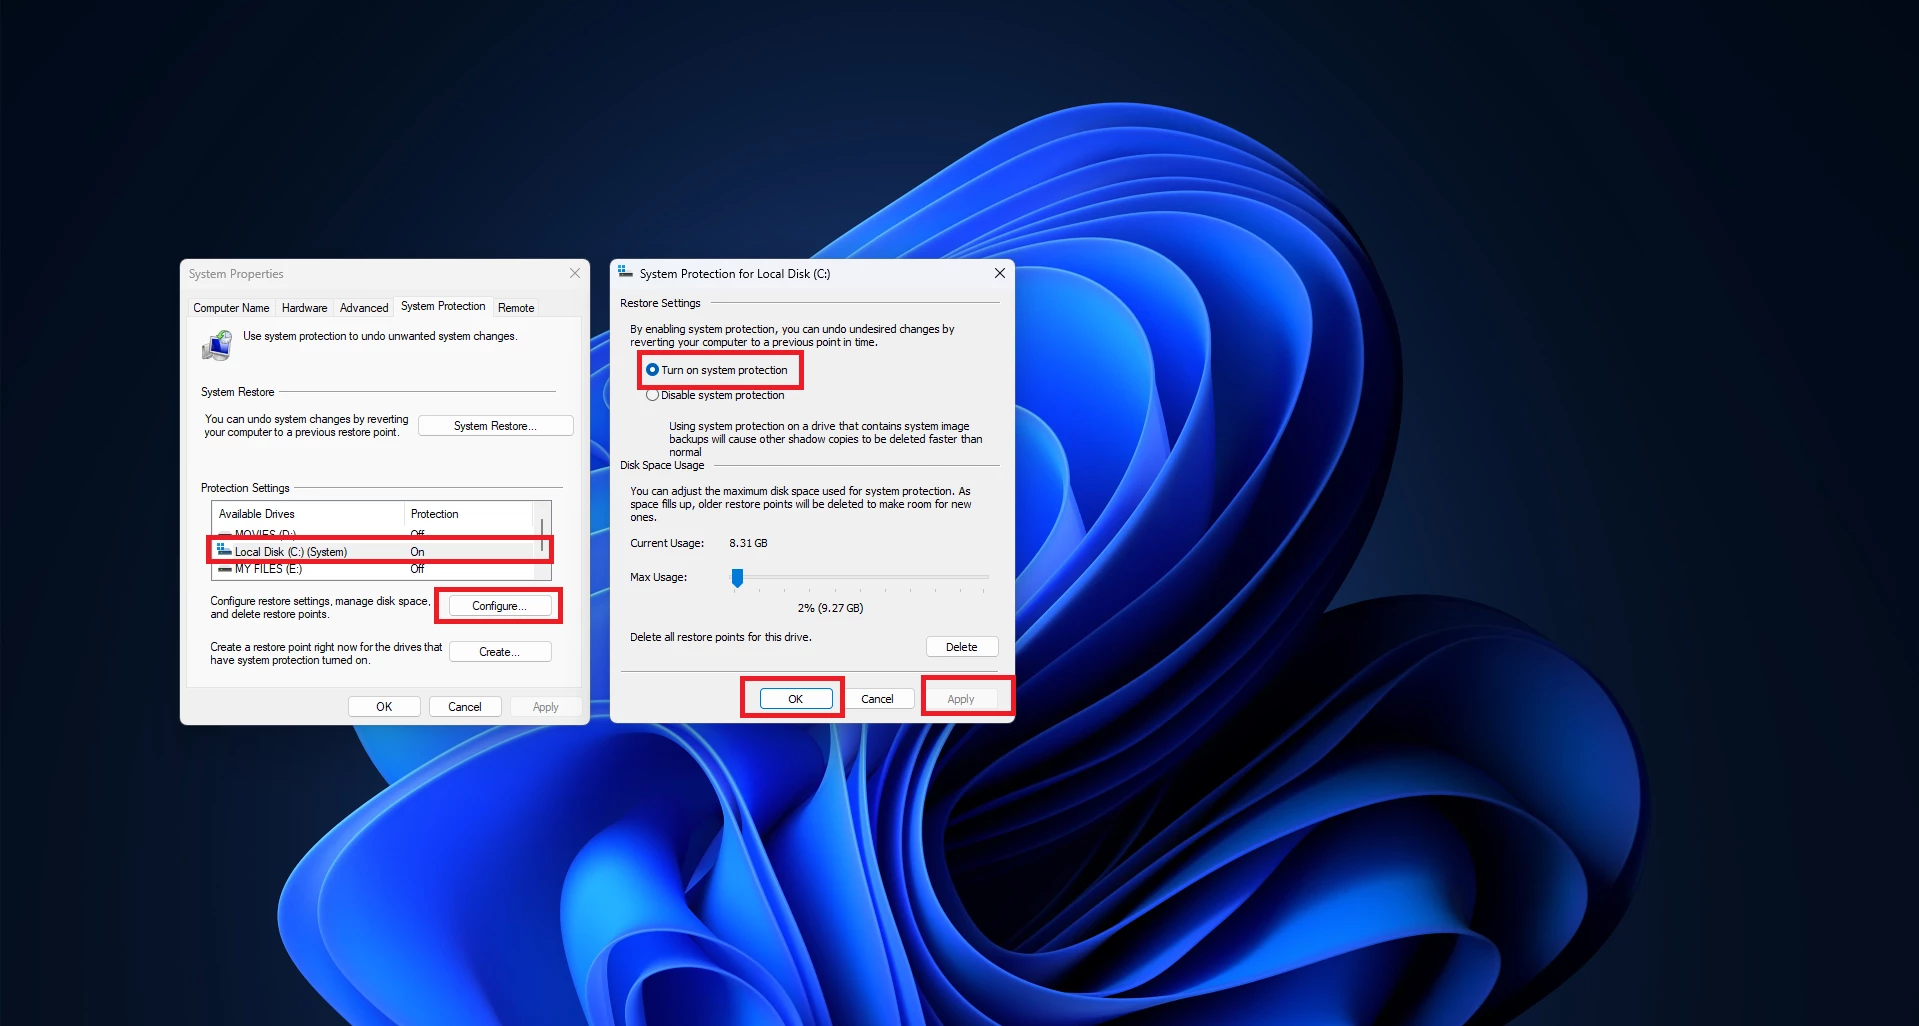
- Go to the System Protection tab.
- Under Protection Settings, select your Windows drive, usually Local Disk (C:).
- Check whether System Protection is turned on or off.
Step 3: Turn On System Protection
If System Protection is already turned on, you can skip this step.
- Select your Windows drive and click Configure.
- Choose Turn on system protection.
- Use the Max Usage slider to set aside some disk space for restore points.
- Click Apply and then OK to save the settings.
Step 4: Create a Restore Point
- Select your Windows drive again.
- Click the Create button.
- Enter a name for your restore point, such as Before Installing Custom Theme.
- Click Create to continue.
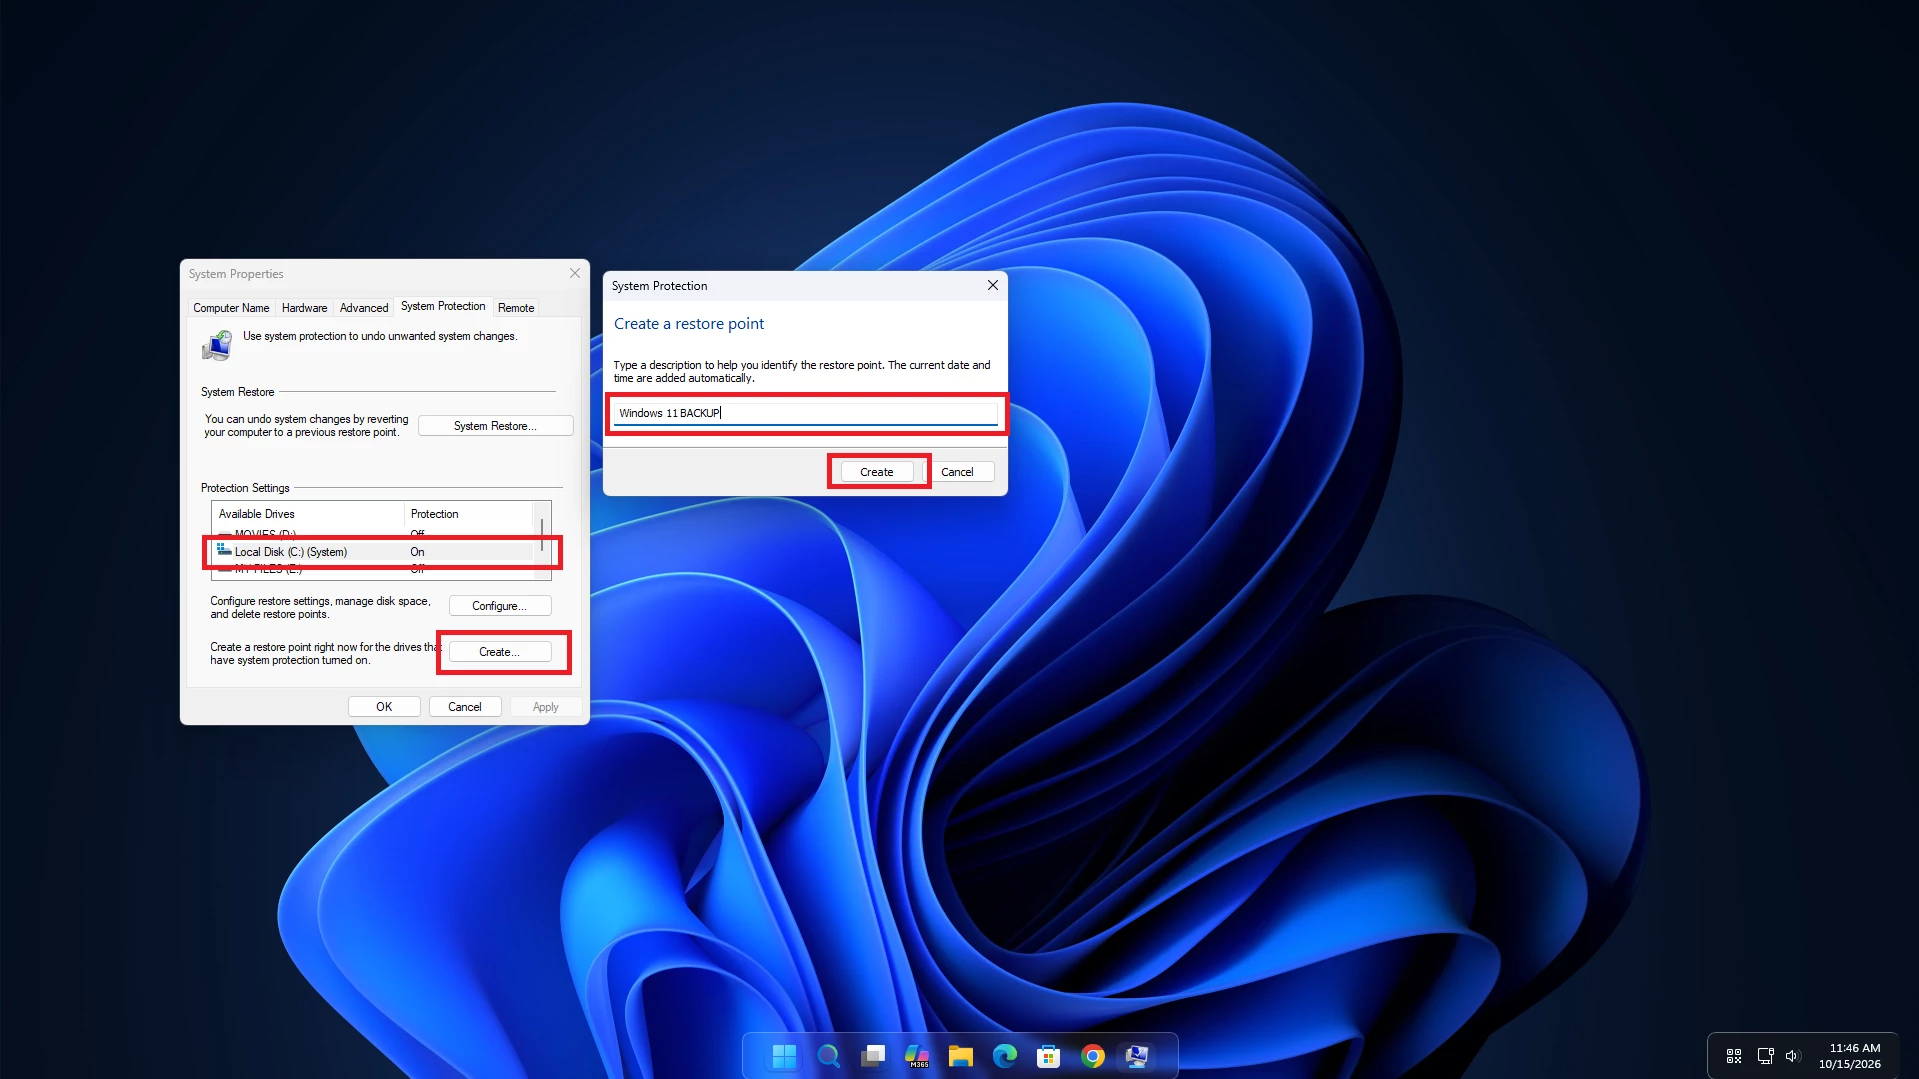
Step 5: Finish the Setup
Windows will now create your restore point. Once the process is complete, you will see a confirmation message.
Simply click Close to finish.
That’s it! Your System Restore Point is now ready. You can use it later if you need to bring Windows back to its previous system state.
Part 2: How to Use a System Restore Point in Windows 11
If something goes wrong after installing a custom theme, icon pack, or other customization software, you can try using System Restore to bring Windows back to an earlier state.
Make sure you have a restore point created before the problem started.
Step 1: Open System Restore
- Press Win + R on your keyboard to open the Run dialog.
- Type
rstrui.exeand press Enter. - The System Restore window will open.
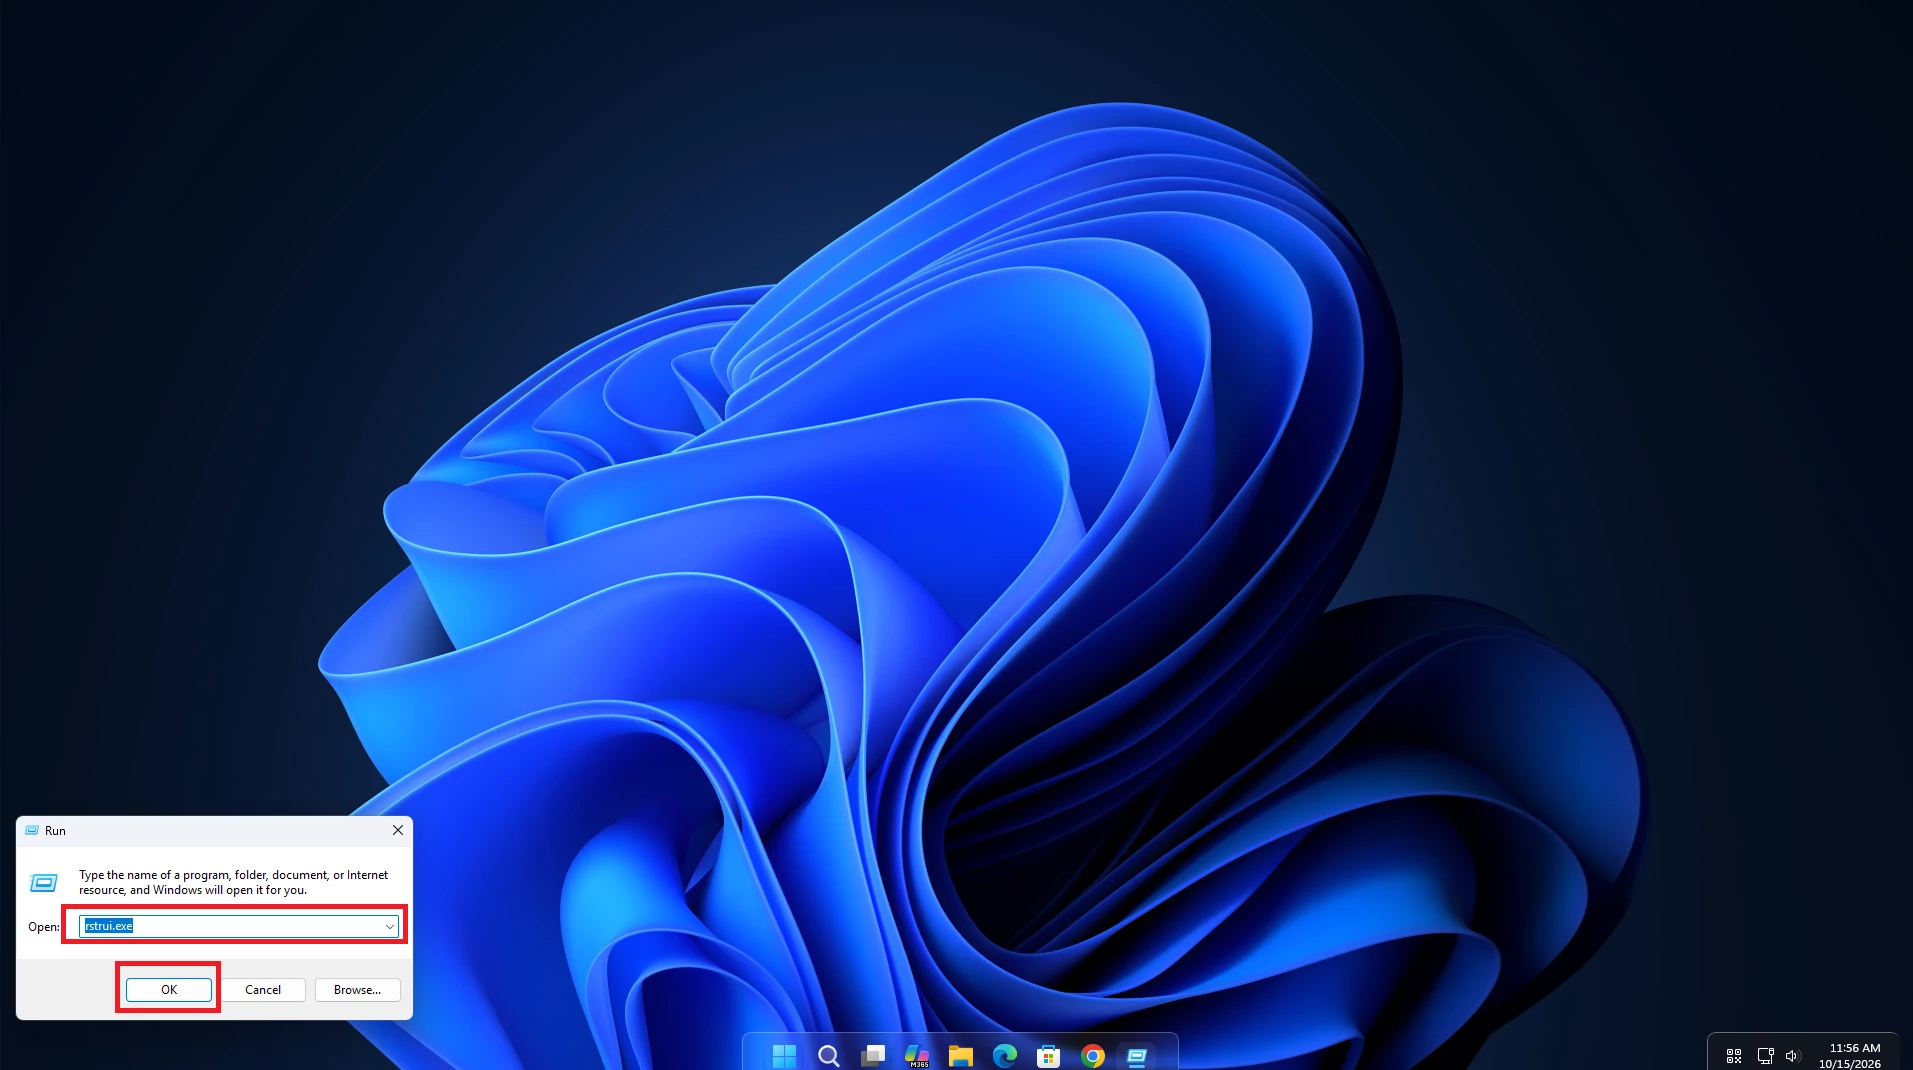
Step 2: Select Your Restore Point
- Click Next to continue.
- Select the restore point you created before installing the custom theme or customization tool.
- If you don’t see your restore point, click Show more restore points, if available.
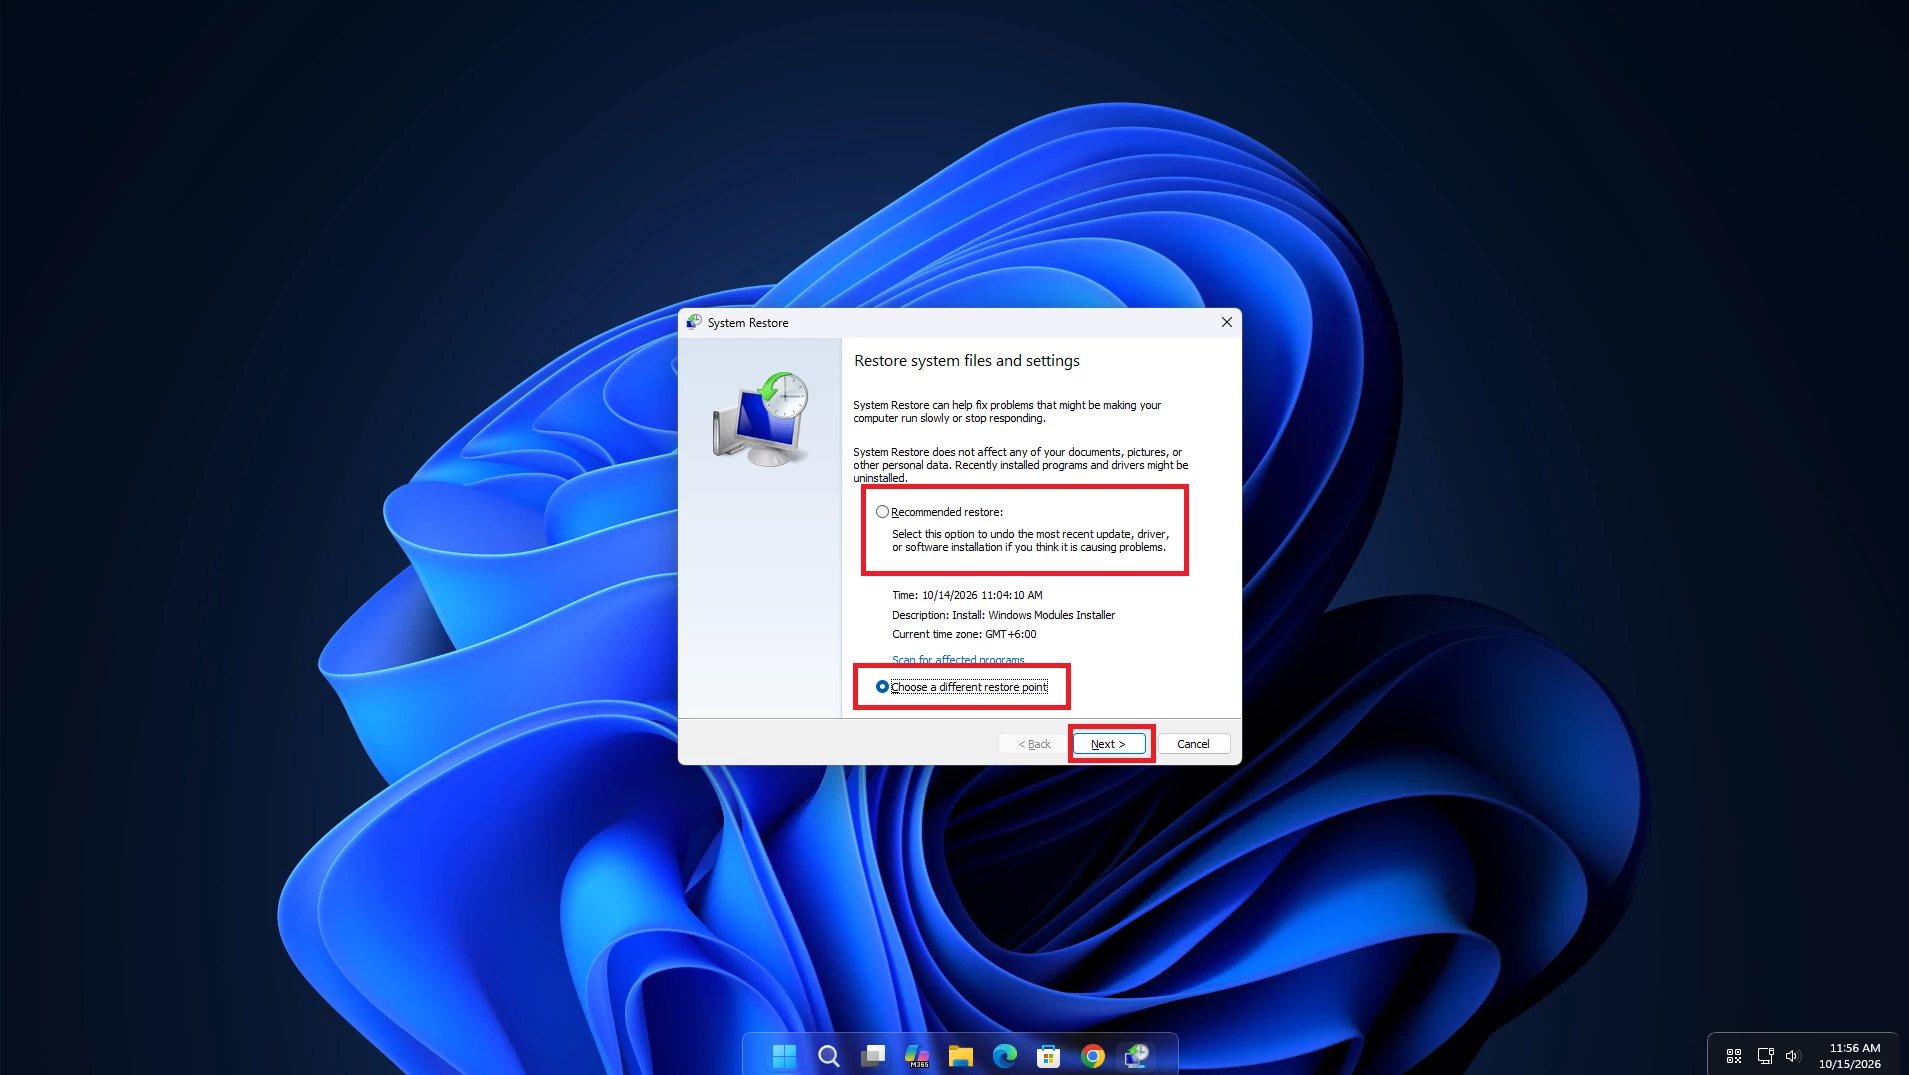
Step 3: Check the Details
- Click Scan for affected programs to see which apps or drivers may be affected.
- Review the list carefully.
- Click Close and then Next to continue.
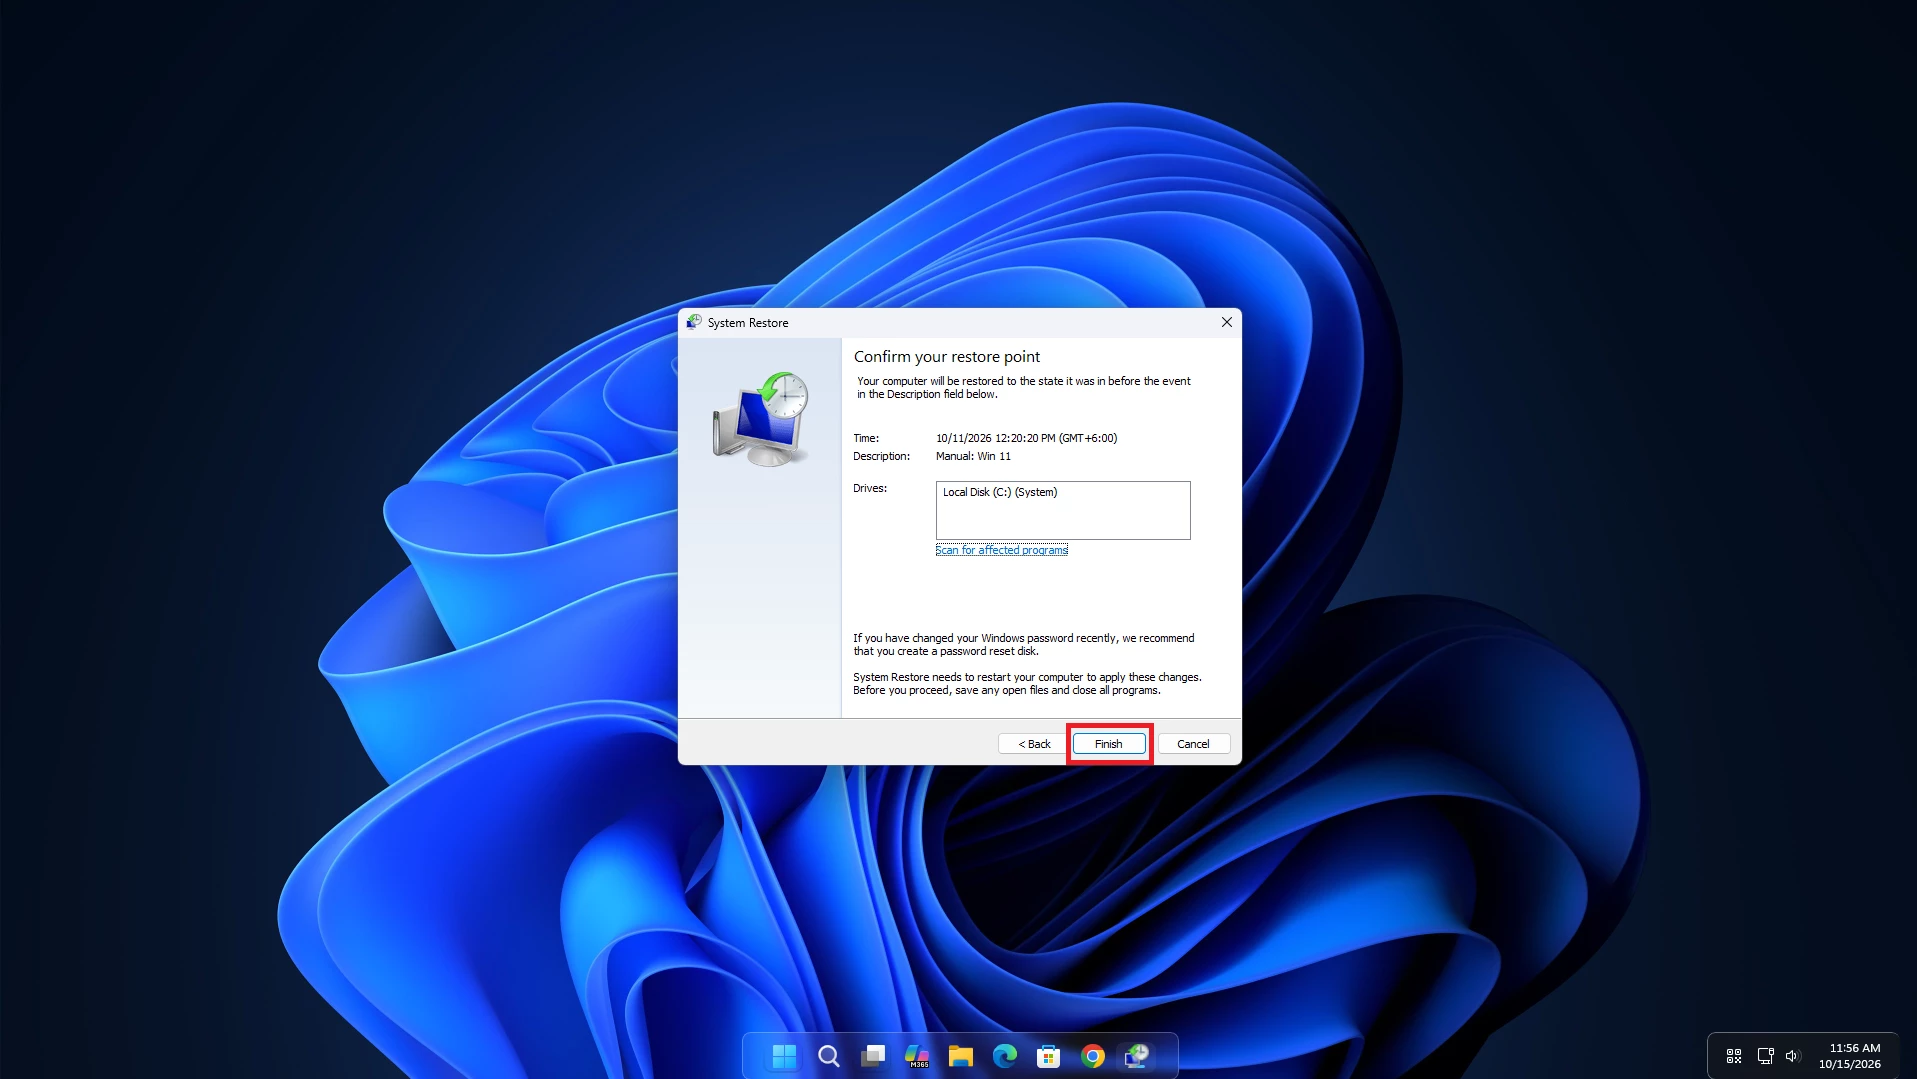
Step 4: Start System Restore
- Check your selected restore point one more time.
- Click Finish.
- Confirm your choice to start the restoration process.
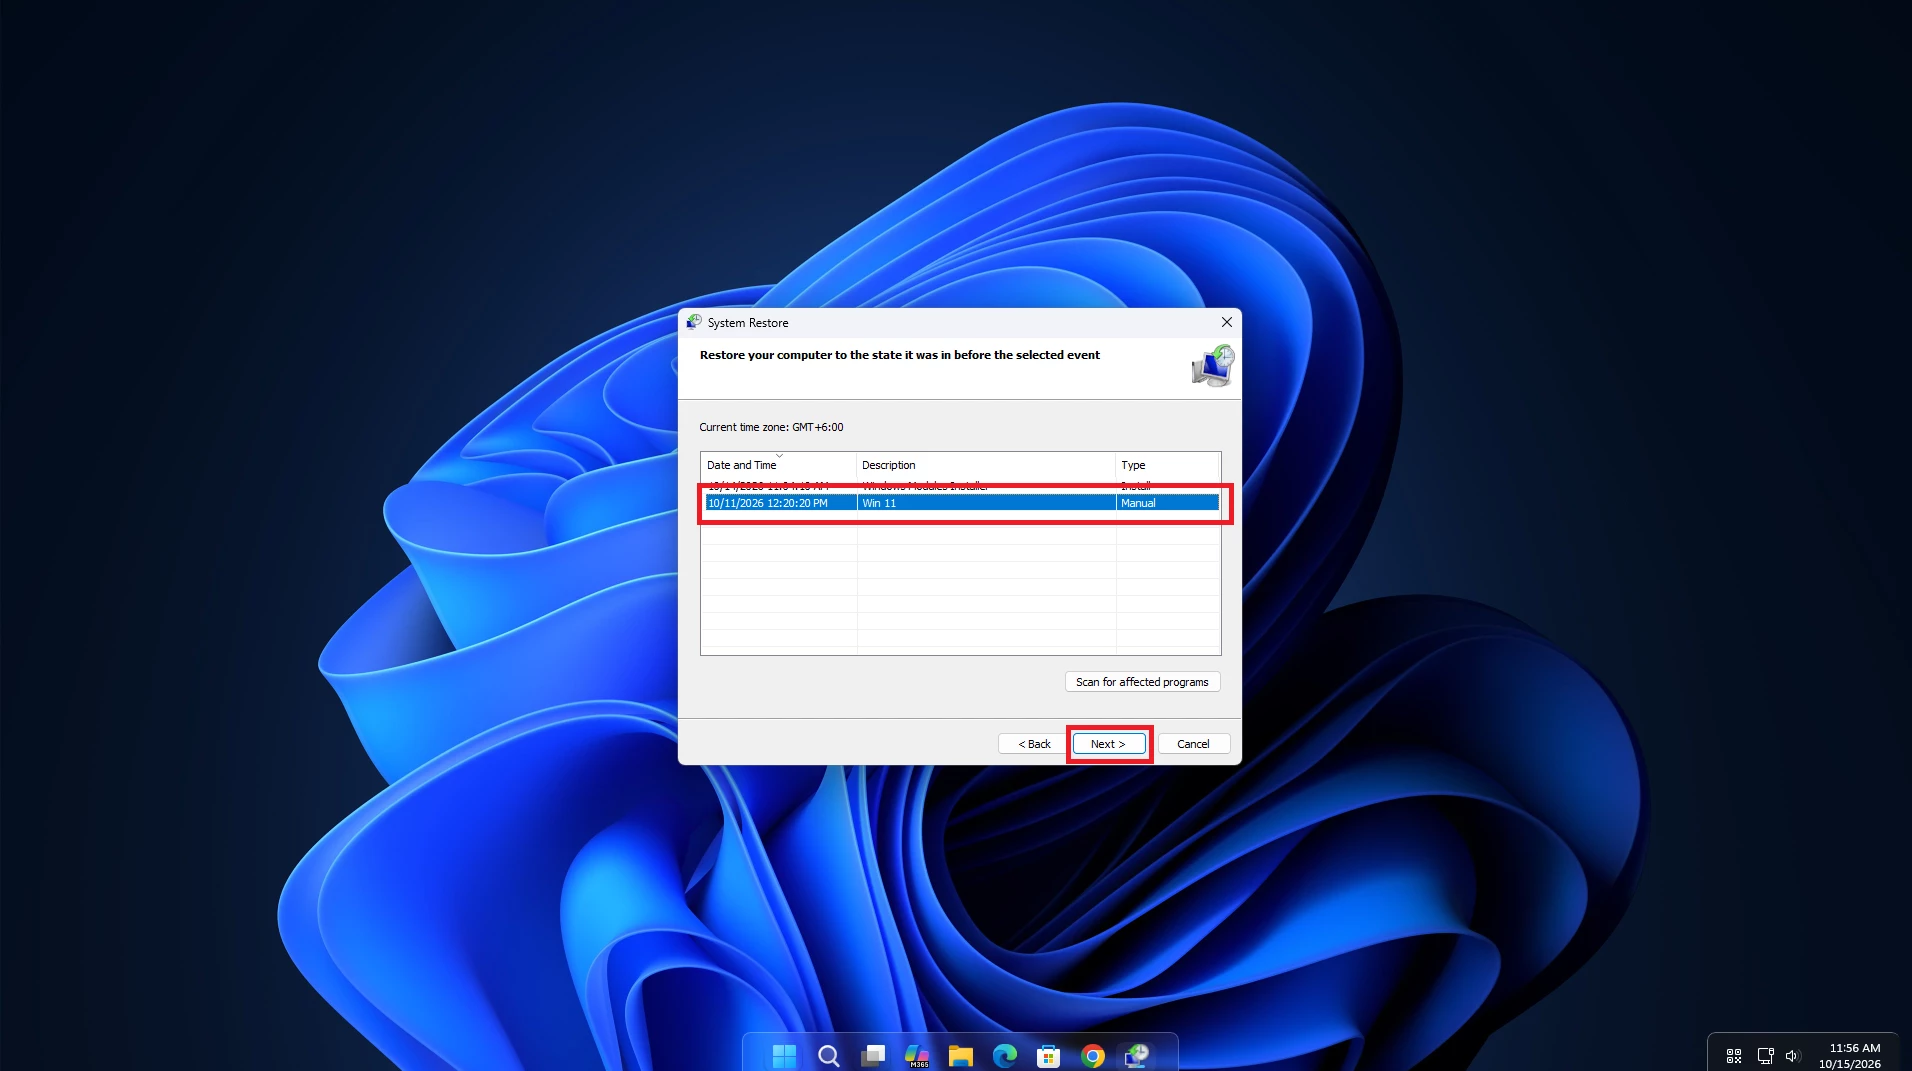
Step 5: Let Windows Finish
Windows will now start restoring your system to the selected restore point.
Your computer may restart during the process. Make sure you don’t turn off your computer while System Restore is running.
Once the process is complete, Windows should restart automatically.
Step 6: Check Your Computer
After your computer restarts, sign in to Windows and check your desktop and system settings.
If you selected a restore point from before installing the custom theme, Windows may restore your previous settings and undo some of the changes made afterward.
That’s it! If the restoration was successful, your Windows 11 computer should now be back to the selected system state.
Important Tips Before Using System Restore
Here are a few simple things to remember when creating or using a System Restore Point.
- Always create a restore point before installing custom themes, icon packs, or other Windows customization tools.
- Choose a restore point created before the problem started.
- System Restore normally keeps your personal files, including photos, videos, and documents.
- Some apps, drivers, and Windows settings added or changed after the selected restore point may be removed or changed back.
- System Restore only works if a suitable restore point is available on your computer.
- Always keep a backup of your important files before making major system changes.
Helpful Tip: If you regularly customize Windows 11, creating a new restore point before making major changes is a good habit. It gives you another way to recover if something doesn’t work as expected.
Official Microsoft System Restore Guide
If you need more help with System Restore in Windows 11, you can also check Microsoft’s official guides. These guides explain how to create a restore point and how to use it to restore Windows to an earlier state.
Helpful Links:
- How to Create a System Restore Point – Microsoft Support
- How to Use System Restore – Microsoft Support
Disclaimer
This guide is provided for educational and Windows customization purposes only. Please follow the instructions carefully and back up your important files before making any changes to your computer.
Important: System Restore and Reset This PC are two different features in Windows 11. They do not work the same way.
System Restore: This feature helps bring Windows system settings, drivers, and installed programs back to an earlier state. It normally does not remove your personal files.
Reset This PC: This feature reinstalls Windows and gives you the option to keep or remove your personal files. It also removes installed applications and resets Windows settings.
This guide only explains how to create and use a System Restore Point. It does not explain how to reset or reinstall Windows.
System Restore may not fix every Windows problem or undo every customization change. Results can vary depending on your system and the restore point you choose.
Always check the selected option carefully before continuing, and use these features at your own risk.
You may also like
Disclaimer: All themes, visual styles, and concepts shared on this website are unofficial, fan-made creations built from imagination for customization purposes. We are not affiliated with, endorsed by, or sponsored by Microsoft or any other official brand.